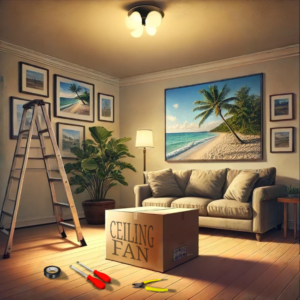
Hey there, homeowners! If you’re looking to beat the heat and add a touch of style to your home, learning how to install a ceiling fan is a valuable skill. In this handy guide, we’re going to walk you through the process step by step, so you can tackle this DIY project with confidence. And if you’re not feeling up to the task yourself, don’t worry – JAC of All Trades Handyman is here to help!
1. Gather Your Tools and Materials
Before you start installing your ceiling fan, make sure you have all the necessary tools and materials:
- Ladder
- Screwdriver
- Wire Cutters
- Electrical Tape
- Ceiling Fan
Ensure you turn off the power to the room at the breaker box before beginning – safety first!

2. Remove the Existing Fixture
Start by removing the existing light fixture or fan from the ceiling. Be careful not to damage any wires during this process. For detailed instructions on removing light fixtures, check out our guide on light fixture removal.
3. Install the Mounting Bracket
The next step is to install the ceiling fan mounting bracket. This essential step ensures your fan is securely attached to the ceiling and provides a stable foundation for operation. Follow the manufacturer’s instructions for the best results.
4. Wire Your Ceiling Fan
Now, it’s time to wire up your new ceiling fan. This part can be a bit tricky, so if you’re not comfortable working with electrical wiring, it’s best to leave it to the pros like JAC of All Trades Handyman. Here’s a quick overview:
- Connect Wires: Match the ceiling wires with the fan wires (typically black to black, white to white, and green or bare copper for ground).
- Secure with Electrical Tape: Insulate each wire connection with electrical tape to ensure safety and functionality.
For more on safe electrical practices, visit safe electrical wiring practices.
5. Attach the Fan Blades
With the wiring complete, attach the fan blades to the motor. Ensure they are securely fastened to avoid wobbling. The manufacturer’s guide will provide specific instructions for your fan model.
6. Turn the Power Back On
Finally, turn the power back on at the breaker box and test your new ceiling fan. If it runs smoothly, you’ve successfully installed your ceiling fan. Take a step back and admire your handiwork – not only have you added a stylish feature to your home, but you’ve also learned a valuable skill that can save you time and money on future projects.

Call to Action
Installing a ceiling fan can be a complex task, especially if you’re not familiar with electrical work. If you ever find yourself in over your head, JAC of All Trades Handyman is always just a phone call away. Our skilled team can handle all your installation needs quickly and safely.
Contact Us:
- Phone: (555) 123-4567
- Email: info@jacofalltrades.com
- Website: www.jacofalltrades.com
Additional Tips and Resources
- How to Unclog a Drain Without Chemicals
- A Beginner’s Guide to Basic Electrical Repairs
- Effective Ways to Soundproof a Room
By following these steps and considering professional help from JAC of All Trades, you can ensure a smooth and successful ceiling fan installation. Happy installing!
Other Projects:
External Links:
